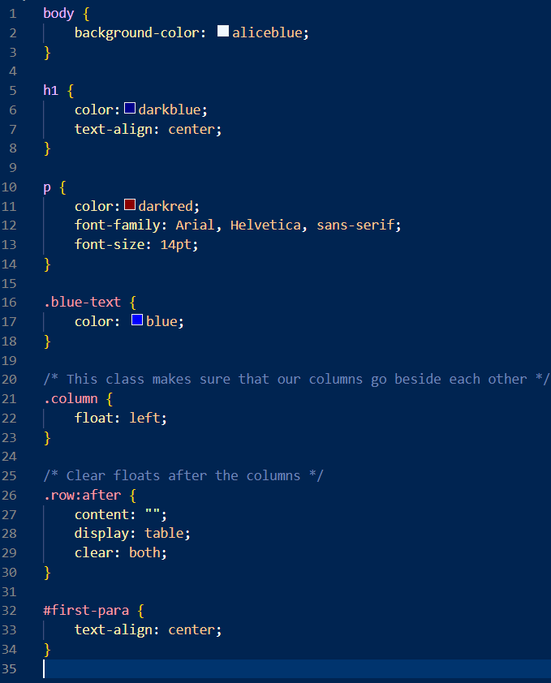
Classes
Most of the time when we are styling a website we want to be able to make tailored changes to individual elements, rather than broad stroke changes to everything all at once. To do this we can use classes and ids, let's look at classes first.
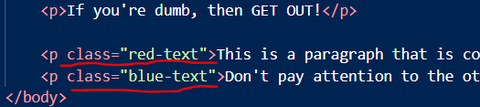
Let's say I wanted to have paragraphs of text that had different colours, red and blue. What I can do is create classes that we put onto our HTML elements that will set them with the specific colour. For example:
Let's say I wanted to have paragraphs of text that had different colours, red and blue. What I can do is create classes that we put onto our HTML elements that will set them with the specific colour. For example:
Now that we have put these classes on our HTML element we can add our CSS that will do the job that we're wanting done. Here's our CSS:
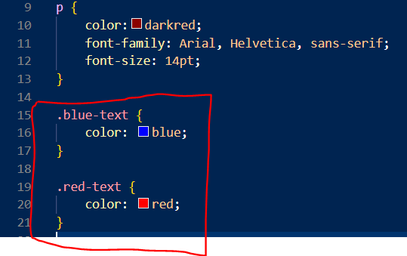
Pay close attention to the "." at the start here. This is how we specify that something is a class in CSS. In the HTML file we write: class="red-text" which is just .red-text in the CSS.
Classes are very handy because we can re-use them on as many elements as we like. If we want to colour any text element red or blue now, all we need to do is add on our class and KACHOW, it'll be that colour.
Task 1: Create 4 classes in your trains website and use them to style some elements in different ways. Try adding properties to elements that you perhaps haven't toyed with yet (like <img>). Hint: try using border-radius.
Task 2: First, make sure that you have 5 different images on your site.
Next, create 5 classes in your CSS: .img-xs, img-s, img-m, img-l, img-xl
Use the "width" property to set these with different widths (xs being the smallest, xl being the largest) and give these classes to the different images on your site.
IDs
Often when we are making a website we want to target one specific element of a page and none of the rest of them. To do this we use an ID. Unlike classes which can be used as many times as we like, an ID should only be used once. Just like you have a student ID number which is unique to you, an id on a page should be unique amongst the other elements.
As an example, let's say that we want the first paragraph and only the first paragraph on our page to be centered, we could apply an ID to it:
As an example, let's say that we want the first paragraph and only the first paragraph on our page to be centered, we could apply an ID to it:

The CSS will look like this:
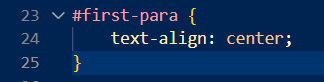
Notice that for IDs we use a "#" in the CSS, whereas in we use a "." for classes.
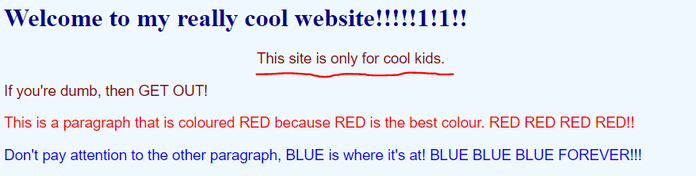
The page will look like this with only the first element centered:
The page will look like this with only the first element centered:
Note: When you go to create a class or an id, think about whether you want only ONE element to use it, or whether it is for multiple. Remember an ID is for just one, a class can be for as many as you like (just like there are many students in our 11DT class!).
Task: Create 3 IDs in your CSS that each do something different. Use each one on a different page of your web site.
Task: Create 3 IDs in your CSS that each do something different. Use each one on a different page of your web site.
Alphabetical Order - an update
We already know that we are meant to arrange the selectors alphabetically, as well as the properties inside these selectors.
With the addition of classes and IDs, it is important to know the order that we should show everything in, this is:
1) Main element selectors first, for example: body h1 img
2) Next we order our classes: .first .second .third
3) Finally our IDs: #first #second #third
Task: Make sure that your CSS is in the correct order.